"So he called its name Rehoboth, saying, 'For now the LORD has made room for us, and we shall be fruitful in the land.' " Genesis 26:22b

Posts tagged ‘construction’

Always Busy

Hi Everybody,

I am SO sorry that it has been such a long time since I posted!! We have been crazy busy over the last two months. As many of you know, my brother Josh is marrying Caitlin in September, I am crazy excited! So, combine that with a week of camp, hay season, a full garden, animal care, back porch building, Faith’s birthday 2 weeks ago, Daddy’s Birthday Saturday, and My birthday on Monday!!! Put all of that together and you get a VERY busy couple of months, Oh, and one of our trucks is in the shop too. I hope ya’ll enjoy these next few pictures. Oh, by the way I did not take all of these. Enjoy!

Bos'n and Tootles soon became best friends! They are so cute together.

Bos’n and Tootles soon became best friends! They are so cute together. Bos’n stretched out on the cool garage floor, Tootles decided it would be the perfect place to catch a nap. 

We survived the Jungle Run!!

We survived the Jungle Run!! Life action camp 2015.

Our cat Sally, nursing her 6 kittens. There names are, Nameless #12345 and 6.:)

Our cat Sally, nursing her 6 kittens. Their names are, Nameless #12345 and 6.:)

A beautiful rainbow brightens the dark sky.

A beautiful rainbow brightens the dark sky.

Fairy tale clouds over the woods.

Fairy tale clouds over the woods.

The garden is definitely producing this year!

The garden is definitely producing this year! Mom with a bucket full of collards.

Newest additions to the farm.

Newest additions to the farm. Adorable little ducklings. 

Samuel tubing with our camp family assistant. We had SO much fun!

Samuel tubing with our camp family assistant. We had SO much fun!

God is good!! I’ll post again soon. -GMA:)

Lady Sheep

A few days ago, we purchased 4 Kathadin ewes, (female sheep), from a local farmer. We got 3 ewe lambs, (born this past spring), and one proven ewe, which means she is about 3 years old and has already had a couple of seasons of lambing. Lord willing, we’ll have 4-8 more lambs this coming spring. Every year, we’re naming our new batch of sheep after a certain theme, chosen by Mum. This year it’s herbs. Being that there’s 4 girls and 4 new sheep. We each got to chose an herb name.

image

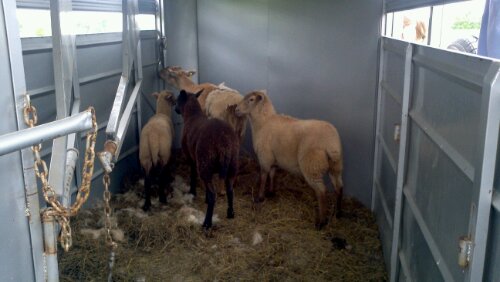
The sheep in our horse trailer.
The largest sheep, in the back of the picture is the 3 year old, who I named Cicely. The black one was named Tansy by Grace has the brown one with the dark legs was named Ginger by Faith, and the biggest brown one was named Jasmine by Abigail.

image

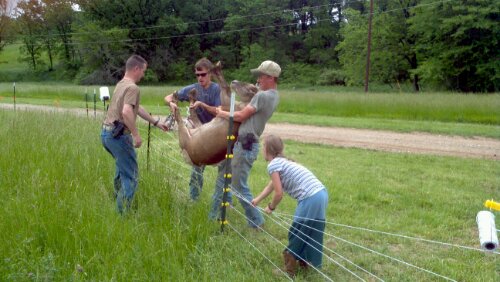
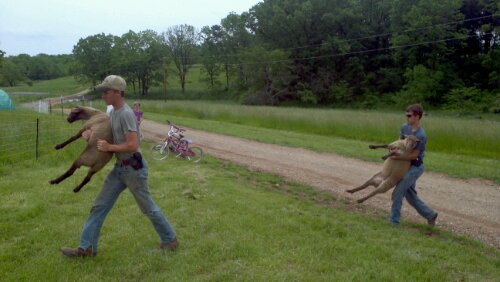
The boys hefting Cicely over the fence

image

Cicely meeting Churchill

image

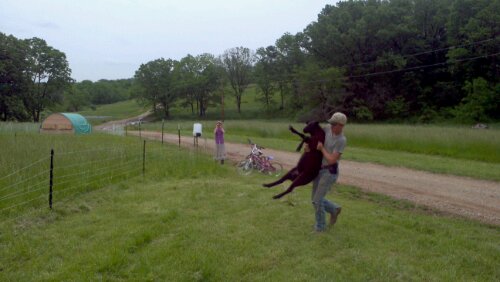
Daniel carrying Tansy

image

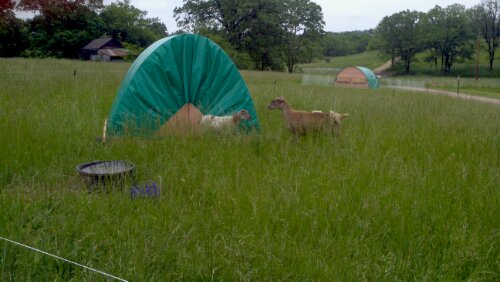
Ginger and Jasmine

image

Daddy watching the sheep to see how they like there new home.

image

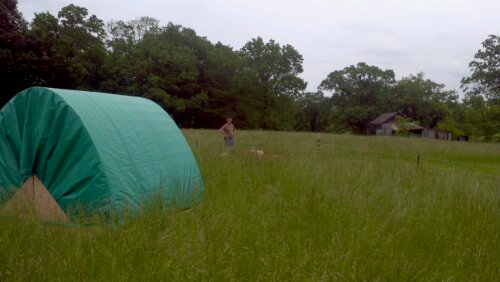
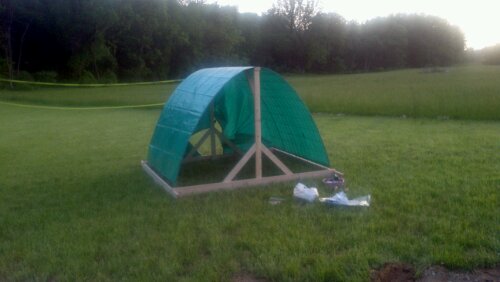
The front of the sheep shelter during construction

image

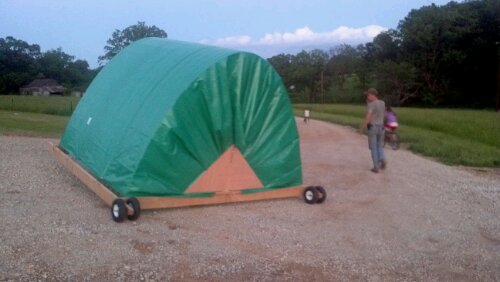
The rear of the shelter.

Lastly, here’s a random picture of Samuel. Just because he’s cute *smile*

image

~ Amy

Painting Part 1

The entire main floor of our home came from the factory primed for painting. We painted the entire main floor Antique Buff by Valspar, (a neutral beige), with a few exceptions.

  1. The kitchen was painted Butter by Olympic
  2. One wall in Mum and Daddy’s room was painted Yacht Harbor by Behr

Also, I just wanted to extend a huge thanks to all our friends who came to help with painting. It was an enormous blessing!

Our paint! (A total of 48 gallons)

The pod hallway. The first door at the end of the hall goes into the garage, the first doorway on the right is the bathroom, the second is the laundry room, and the third (not visible in this picture), is the pantry. The door on the left will open onto the front porch. Lockers will eventually be built by Josh and Daniel onto the left-hand wall.

The hallway after paint.

The hall-bath before paint.

The hall-bath after paint (The truest color in this picture is the narrow wall beside the shower)

The laundry room prior to painting. (The washer and dryer along with an upright freezer will go on the left wall and a bank of cabinets will eventually be built on the right wall for folding clothes/sewing. Also note that the boxes stacked up are the laminate flooring for the upstairs.)

The laundry room after painting.

A little woodpecker on a hickory tree near the house.

Remember, the big move is this Saturday!!

~ Amy

Drywall Part 2

After all the drywall went up we hired a mudder to finish the walls and get them ready for paint.

The boys’ room all mudded

Another view of the boys’ room (The silver pipe is the chimney pipe from our wood stove. There will be a drywalled box around it eventually.)

The boys’ bathroom drywalled and mudded (The drywall in the bathrooms was green because it is a water-resistant drywall.)

The main dormer all mudded

Another view

Getting ready to mud the girls’ room. (The black things in the window are the mudders stilts. He mudded around the top of each room first wearing his stilts to avoid the need for a ladder.)

The outside wall of the girls’ room

Another breathtaking sunset!

Each day I am awed by God’s majesty as displayed in a microcosm thru the phenomenal sunsets every evening!

(A panoramic view)

~ Amy

Drywall Part 1

Samuel helping Daddy crank up the first sheet of drywall.

S t r e t c h ! Daddy and Daniel putting the drywall up on the ceiling of the girls’ dormer.

The girls’ room ceiling, completely drywalled.

Another view of the ceiling in the girls’ room.

Daniel with the drywall lift. (Note the drywalled upper slope behind him.)

The ceiling of the schoolroom completely drywalled with the exception of the dormer.

Daniel cutting a hole for the can light in the main dormer.

Josh and Daniel screwing in a sheet on one of the front slopes of the schoolroom.

Josh and Daniel measuring for the next sheet of drywall.

Phenomenal sunset that evening!

To close with, here is a picture of our house as of 6 days ago:

~ Amy

Insulation!

Hello everyone!

To ease our budget, we chose to insulate the upper story of our home ourselves. In order to do that we had to measure everything and cut it to fit in between each 2×4, 2×6, etc. Also, we were using fiberglass insulation so there was constantly risk of fiberglass splinters so we had to wear long sleeves, long pants, gloves, respirators, and goggles to avoid ‘unnecessary exposure.’ (I think most of us still managed to get splinters!)

We used three main types of insulation: faced batts for the ceilings, unfaced batts for the rafters, and faced rolls for the walls.

Samuel rolling in insulation

He was very happy to get a ‘big boy’ job!

Batts of faced insulation all stacked up in Daddy and Mum’s bedroom

Rolls stacked in Mum’s closet

Insulation out the wazoo! Unfaced batts stacked in Daddy’s closet.

Faith dressed for putting up fiberglass insulation

Mr S—- helping to cut insulation

Grace and Mr S—- putting up insulation in the girls’ bathroom

The boys’ room dormer completely insulated

Daddy and I stapling baffles in the back of the girls’ room closet.

Baffles, (or rafter vents), are stapled beneath the insulation to allow air flow and prevent condensation buildup.

Mum and Daniel stapling insulation in the girls’ room dormer

Insulation scraps stacked in the schoolroom, ready for use

Baffles almost done in the boys’ room closet

Daniel stapling insulation in the boys’ dormer. (Notice the baffles. . . The hardware store was out of the pink ones so we had to get these for the rest. Same thing different color/style)

Daniel and Josh still working in the boys’ dormer

Me working on stapling the insulation in the back of the boys’ closet.

Daddy helping Abigail to staple insulation in the main dormer. (It was all she could do to squeeze that staple gun shut!)

~ Amy

Update

I’m sorry it’s been so long since my last post! All the house pictures have been on Josh’s phone and he’s been so busy with house stuff that he hasn’t had time to upload them onto the computer.

That being said, we’re almost done!! The entire main floor is painted except the for the kitchen, and the upstairs is completely drywalled and primed. Daddy has set the 24th of November as the move in date, ‘wether we’re ready or not’.

The things that have to be done before we move in are:

  1. The kitchen needs to be painted
  2. The hardwood floor needs to be laid down on the main level
  3. The pantry shelves need to be built
  4. Hanging rods need to be purchased/installed in all 4 clothes closets (Daddy’s, Mum’s, boy’s, and girl’s)
  5. The upstairs needs to be painted (including ceilings)
  6. Laminate flooring needs to be put down upstairs
  7. The upstairs bathrooms need to be tiled
  8. The upstairs toilets need to be purchased and installed
  9. The upstairs vanities/tops need to be purchased and/or built and installed
  10. And last but certainly not least, the stairs down into the basement need to be built

I know it seems impossible, but I am constantly reminded that, as Philippians 2:13 says,

“I can do all things through Christ who strengthens me.”

Please note that following this post will be a series of posts, (with pictures *smile*), that will hopefully bring you up to date.

Have a blessed day!

~ Amy

Framing the Upstairs

The past 2 weeks the boys have been working on framing the upstairs. (Where the kids bedrooms, bathrooms, and schoolroom will be.)

Here’s a diagram I drew of the upstairs. The black walls are walls that were on the house when we got it. The red walls are walls that the boys have framed. (Please note that the drawing is not to scale. Also, the proportions are a little off.)

The 2 bedrooms are on either side of the upper story. The boys’ is on the far left and the girls’ is on the far right. The schoolroom is in the front of the middle space and the two bathrooms are in the back of that same space. (The red wall in the back of each bedroom is the front wall of the closet. Also, the red box in the boys’ room is the 2 foot box around the chimney pipe of our wood stove. Oh, and the red wall just to the left of the girls’ bedroom wall is the wall beside the stairs.)

Abigail investigating the blueprint. (Laid out in the floor of the girls’ room.)

Josh, Daniel, and I checking the girls’ closet wall for level.

Josh and Daniel nailing in the last studs for the girls’ room wall

Josh hammering on the girls’ wall a little to make it level while I held a board up to prevent the sledgehammer from marring the studs.

Daniel cutting a notch out of a rafter to help the bedroom wall fit better,

Samuel stacking up scraps.

Daniel measuring studs for the end wall of the boys’ closet

Josh and Daniel assembling the last of the boys’ room wall.

Josh and Daniel raising the boys’ bedroom wall.

Josh, Daniel, and I measuring the boys’ room wall to estimate drywall and installation.

~ Amy

House Set Part 2

Setting the second module.

Raising the roof on the second module. (In case you’re wondering, some of the shingles were put on in the factory. The big hole is for a shed dormer.)

See?

God’s beautiful sunset!

Here’s that same sunset reflected on the back of our house. I can’t believe I’m saying this, but I can’t wait to do dishes in this house. (The kitchen sink is under the two windows that are right next to each other.)

The crew working in the dark.

The next day. . . (Note, that most of the shingles are on and all the walls are up. The garage will come off of the mudroom extension in the left of the picture and the porch will wrap from the front corner in the right of the picture, around the corner, and to the door off the mudroom

The hole for the steps down into the basement. (It’s currently covered over with plastic.)

By the way, here is a picture of our second module almost in the creek.

~ Amy

House Delivery Part 2 & House Set Part 1

We officially have a house! Yay!!

The third truck came about 1415. By the time they unloaded the second module, 5 out the 12 wheels on the trailer had gone flat or blown out, 2 on the way up from the factory, 2 getting into the driveway, and 1 coming up the driveway. On top of that, when the truck crossed our creek it slid slightly off the driveway, putting a big whopping dent in one of our 2 culverts. They eventually did get across the creek but it took them upwards of 45 minutes.

The third truck coming up the road!

Getting ready to cross the creek.

While waiting for the second module to arrive, the work crew was far from idle!

They unwrapped the dormers, put moisture barrier paper on them and put the windows in.

Lowering the first module into place.

Making sure it was exactly square with the basement.

Raising the roof and putting the side walls in.

The first dormer is set!

Lowering in the second dormer.

The men and I watching as they secured the dormer. (left to right: Daniel, Josh, Me, and Daddy)

Putting on the next segment of roof.

Past the point of no return! Pulling the trailer out from under the second module.

Setting the second module.

I’ll post more pictures later!

~ Amy